WingetUI is a very easy-to-use tool for installing and updating Windows software. Winget is a great package manager included with Windows, but it requires use of the Command Line, which many people find very intimidating. WingetUI provides a Graphical User Interface that allows user to point and click to accomplish the same things without typing a bunch of cryptic commands. WingetUI can be downloaded for free at https://github.com/marticliment/WingetUI
Using some drivers from an Intel NUC and the Group Policy Editor, it is definitely possible to use your Erying mATX motherboard with just the integrated graphics.
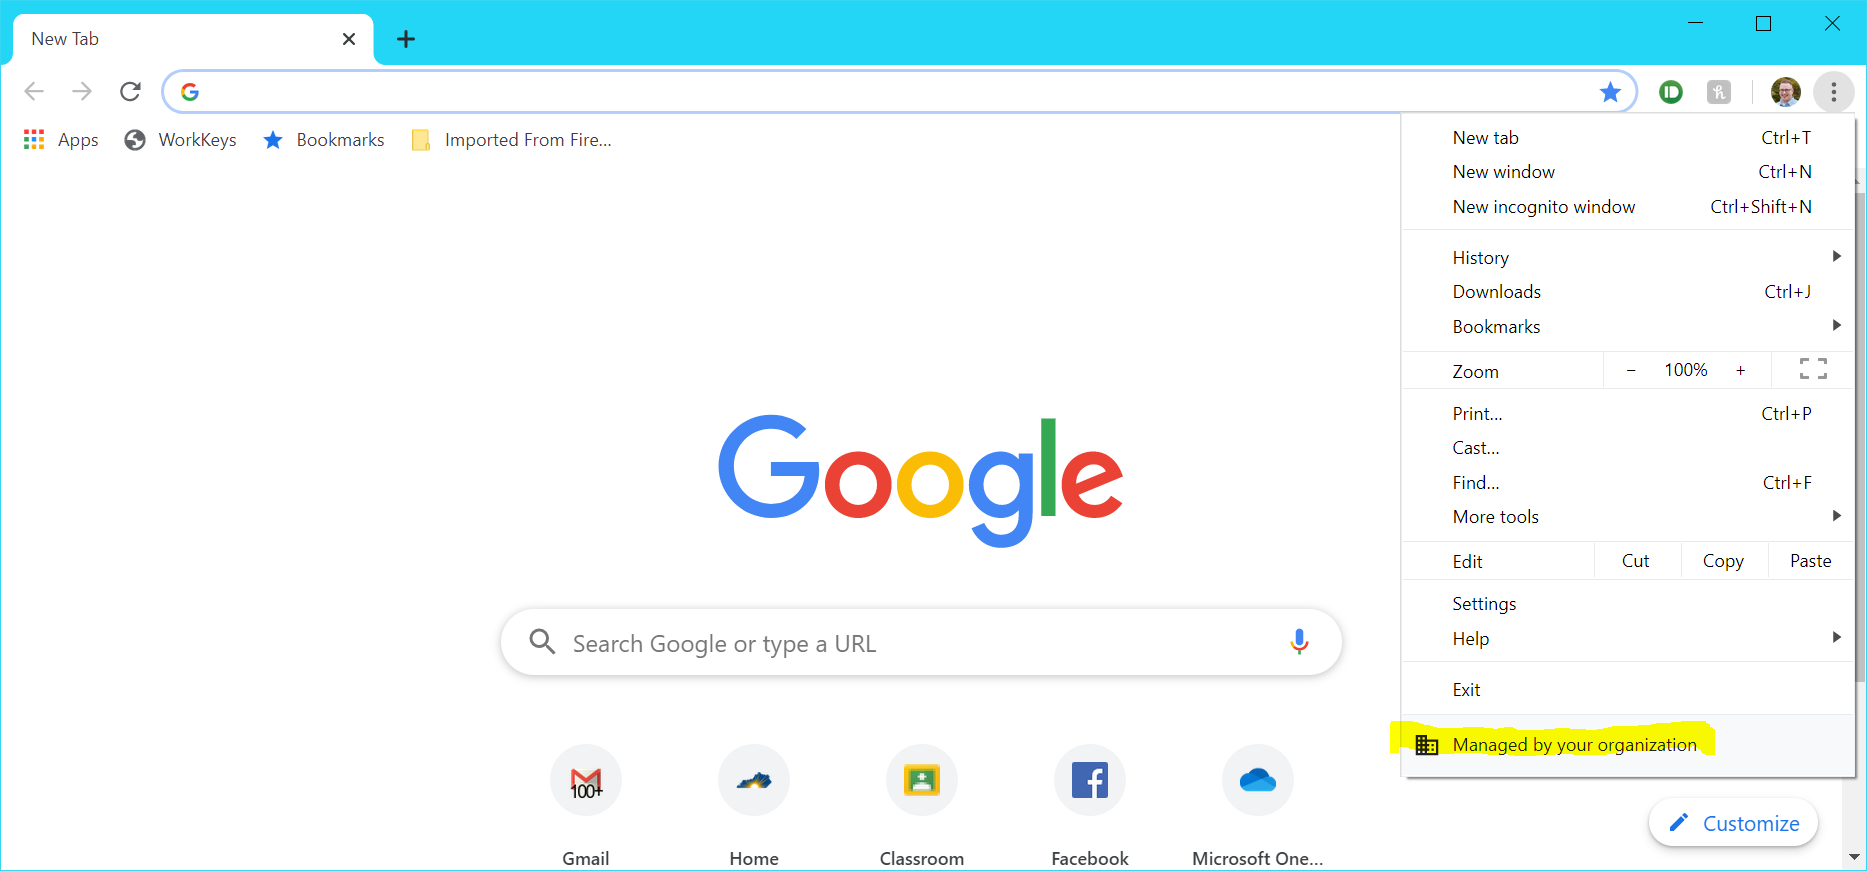
A few minutes ago, I decided to see if I could cast Chrome to a TV. When I clicked the Chrome menu button, I spied something I hadn’t seen before at the bottom of the menu: “Managed by your organization.”
My Chrome browser suddenly said “Managed by your organization”…Except, it shouldn’t have been
The thing is, this laptop has never been managed by an organization, nor is my Google account. Both are, and have always been, mine to do with as I please. And if there’s one thing I don’t like is for my my technology to start telling me I’m not the boss. 😡
So, I started searching around to see what may be the cause of this. After scouring several forums and tech press posts about this, I was able to piece together why Chrome was saying this, and more importantly, how to make it stop sayng my browser was managed by someone other than me.
Why Did My Chrome Start Saying This? If any of the available policies are set for your Chrome browser, it will show the “Managed by an organization” message. Apparently, up until a certain version (I read conflicting reports of the exact version that started it), only certain policies would trigger the warning. Now, however, any set policies will cause it to show up.
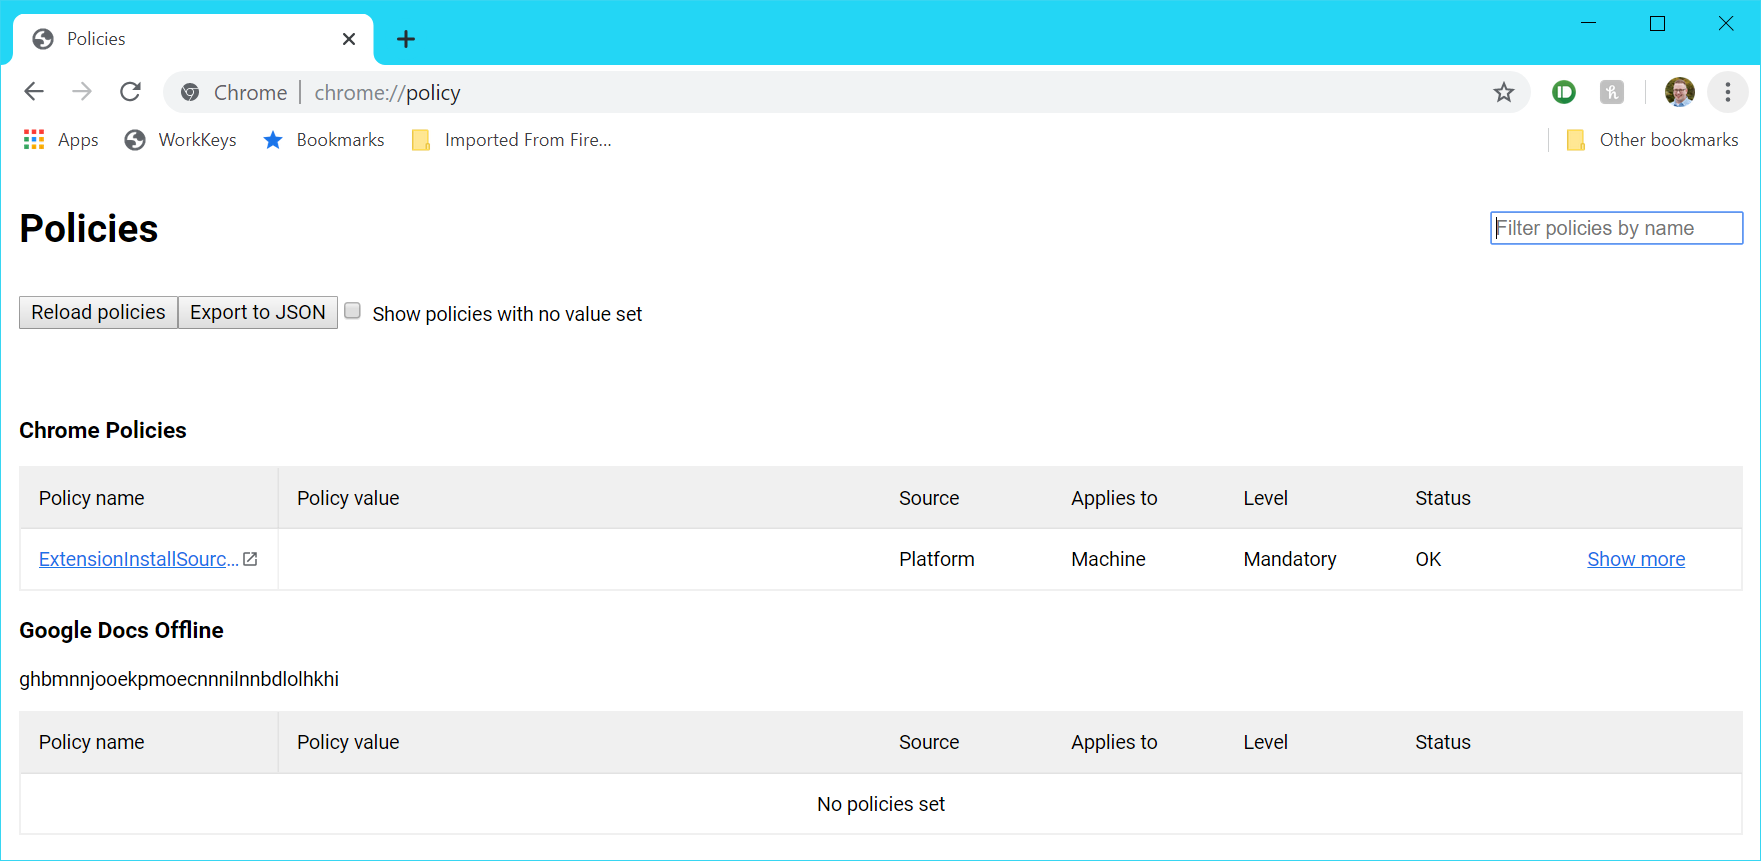
How Can I Check What Policies I Have Enabled? I learned there’s a handy Chrome URL that will show you all managed policies that are enabled. If you type chrome://policy into your address bar, it will show you all the policies applied and what the value of each policy is.
Type chrome://policy into your address bar to see all enabled policies
What Policies Did I Have Enabled? I only had one policy enabled: ExtensionInstallSources and it had no value set. According to some of the stuff I read, malware can set policies to allow malicious extensions to be installed, but ExtensionInstallSources is not one of the bad ones (or so one poster said). And since there was no value set, this policy had zero effect. So I left it at that and didn’t try to remove it, right? OF COURSE NOT.
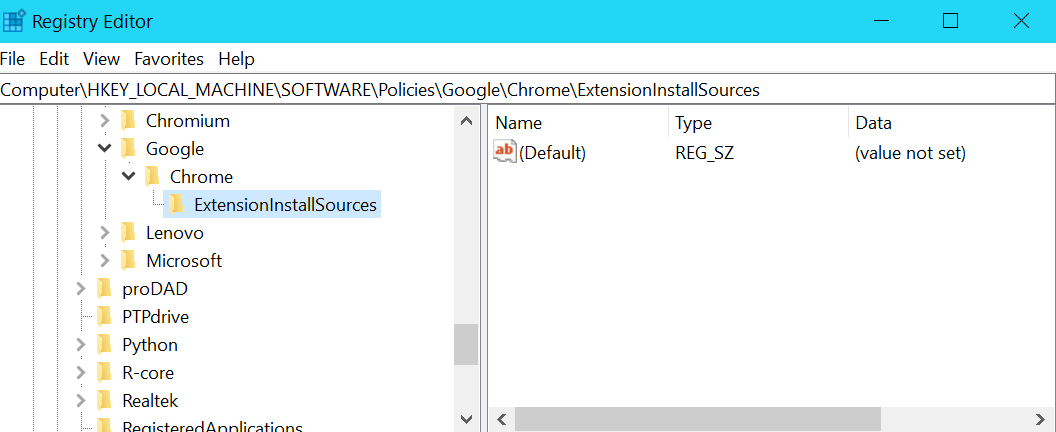
How’d I Get Rid of the ExtensionInstallSources Policy? You would think there’d be a delete option within the chrome://policy page since I am the one who installed Chrome on this machine, but alas, there isn’t. Luckily, I figured out where the Windows registry key was to banish this foul beast (er…the menu item I don’t want to see anymore).
There will be one key in here for each policy enabled. As you can see in my case, the only subkey I had was ExtensionInstallSources and it was empty with no values.
The Windows registry key HKEY_LOCAL_MACHINE\SOFTWARE\Policies\Google\Chrome\ will show you all the enabled policies.
I right clicked the ExtensionInstallSources subkey and deleted it. When I restarted Chrome…HURRAY! The “Managed by your organization” message was gone! I will now be able to sleep peacefully tonight.
I’m assuming you can delete any Chrome policy using this method, but this is the only one I’ve actually tested out. Good luck!
I just bought a Lenovo Yoga 720-13ikb laptop to replace a broken laptop that wasn’t worth fixing. It’s a great machine, but it came with Windows 10 Home edition. That’s fine for most people, but as a Windows nerd, I need Hyper-V support, the Group Policy editor, the packaged app controls, etc. What to do?
Instead of paying Microsoft’s war price of $99 for the upgrade, I headed on over to Kinguin.net and bought a Windows 10 Pro OEM Key (with buyer protection) for $35. (Note: I was leery of Kinguin.net for years because the prices were too good to be true, but I have since bought four OEM keys from them in the last year and they all worked just fine. Kinguin just exploits the fact that Microsoft sells OEM keys in other countries dirt cheap and it is legal to activate said keys anywhere in the world.)
With this new machine, I did have a problem using this cheap OEM key, but it turns out it wasn’t the key but rather how Microsoft handles upgrades from an OEM version of Windows 10 Home (in this case from Lenovo) to a generic OEM Windows 10 Pro key. When I went to Settings > Activation > Change Product Key, the key simply wouldn’t work and I got error code 0xC004F050 which was no help at all.
After a lot of Googling, I figured out what to do to get my cheap Windows 10 Pro OEM key to work:
Go to Settings > Activation > Change Product Key
Enter the following generic Windows 10 Pro key: VK7JG-NPHTM-C97JM-9MPGT-3V66T
Note: that there is nothing nefarious or illegal about this product key and it IS NOT any sort of piracy to use it. This key is what is known as a Release to Manufacturing (RTM) key and is used to install Windows 10 Pro for a trial period. Very importantly (and I’m not responsible if you don’t heed this caveat), this key DOES NOT and WILL NOT activate Windows 10 Pro, it will merely allow you to a) install Windows 10 Pro from scratch for testing purposes or b) allow you to force Windows 10 Home to upgrade to Pro (and then supply your own key when the upgrade is complete).
After entering the key and clicking Accept, Windows will spring into action and do the upgrade process. (Basically, it just enables a bunch of features that are disabled in the install.) My new machine took less than 5 minutes to upgrade, but every machine is different.
After Windows restarts, Windows 10 Pro is installed but not activated. To activate it, once again go to Settings > Activation > Change Product Key. This time, enter your valid Windows 10 Pro OEM code (from Kinguin or elsewhere), and click Activate Windows.
Enjoy all the enhanced nerdy goodness at a very discounted price.
Bonus Tip: For anyone who wants to build a computer from scratch, these cheap OEM keys can also be used for totally fresh installs of Windows 10 (i.e. they’re not just for upgrades).
I’m really excited about the Windows Technical Preview (aka Windows 10) that was released today. I decided to forgo a virtual machine and dual-boot it on my laptop running Windows 8.1. My laptop is an Asus G55VW and the existing Windows 8.1 installation being setup in UEFI (with the requisite GPT partition scheme).
I downloaded the image and made a flash drive using the Windows 7 USB Download Tool, but when I booted from the drive and tried to install, I got an error message: “Windows cannot be installed to this disk. The selected disk is not of the GPT partition style” when I clicked on the empty partition I wanted to install to.
I realized the flash drive was booting the MBR installer, but I needed UEFI. I realized I needed a USB flash drive setup to boot the Windows Technical Preview installer in UEFI mode. Here’s what I had to do to create the bootable flash drive that does just that:
Plug a flash drive into a USB port on your machine.
Download the Windows Technical Preview 64 bit ISO at http://preview.windows.com (you’ll have to join the free Windows Insider program and click through a few screens to get to the download link)
Download Rufus. Rufus is a small utility that will put the ISO files on a flash drive you can use to boot from and install Windows. While there are other utilities that do this, Rufus allows you to specifically setup the flash drive as a GPT boot device. This will allow you to install Windows Technical Preview on a GPT drive, side-by-side with Windows 7/8/8.1.
Launch Rufus.
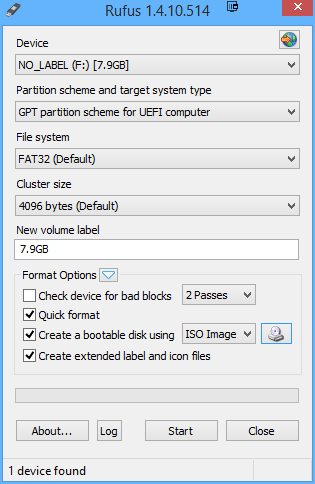
Set the Device dropdown to the flash drive you want to turn into a technical preview installer.
Set the Partition scheme and target system type dropdown to GPT partition scheme for UEFI computer.
Click the little disc icon next to the ISO image drop down and point to the Technical Preview ISO you downloaded in step 1.
Click Start and wait until the status says DONE.
Setup Rufus as shown, using the Windows Technical Preview ISO as the source image
You should now be able to boot from the USB drive and install the 64 bit Technical Preview in dual boot on most machines that boot using UEFI and have a hard disk with GPT. I’ll leave it to you to find out how to create a empty partition to use for the installation, but at least now you will have a UEFI flash drive installer.