Mozilla Composer Tutorial
Tables
Tables can be one of the most frustrating things to learn when you begin learning HTML. Thankfully, though, Composer does a decent job handling them. Inserting a table can be achieved through clicking on Insert | Table or by clicking the Table toolbar:

Rows & Columns
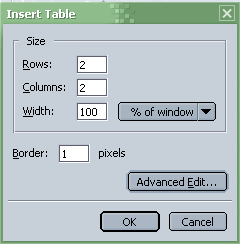
Tables, of course, are arranged in rows and columns. When you click on the Table toolbar button, you'll see a box like this:

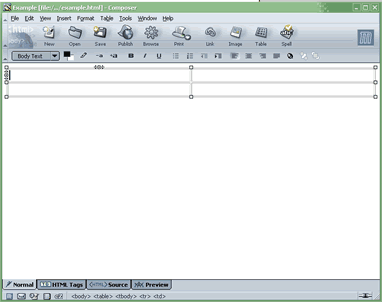
Inserting the table in the screenshot above would result in a table that looks like this:

Cell Properties
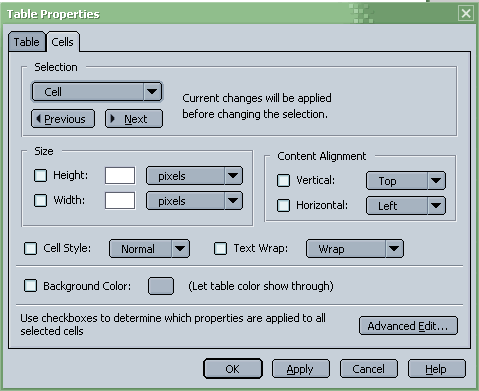
You can move between columns in a table by pressing the Tab key. Double-clicking in any cell in a table yields the following dialog box:

For the current cell, you are provided with all the options seen above.To activate any of the options, click the check box beside it and set the value to whatever you like. Be careful when using the Height option, as the results it yields in may browsers is unpredicable. Double-clicking in a cell and setting its background color to yellow with the Background Color option yields the following result:
| This has some text | This has some text |
| This has some text | This has some text |
Table Properties
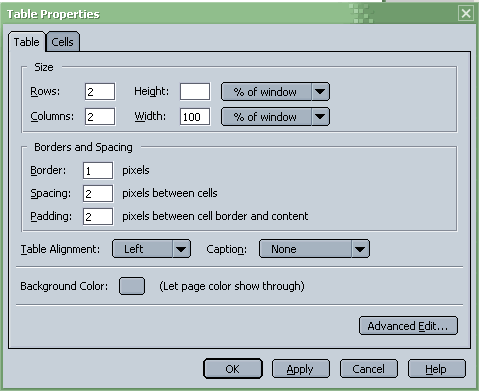
Notice the Table tab at the top. Clicking it yields the following dialog:

Cell Padding and Spacing
Most of the options for the table and the cell properties are self-explanatory. It is important to note the difference between table spacing and padding. The table below was created with a spacing of 10 and a padding of 0:
| This has some text | This has some text |
| This has some text | This has some text |
Notice that there is 10 pixels of space between the cells but no space between the border and the content inside each cell. The following table has cell spacing set to 0 and cell padding set to 10:
| This has some text | This has some text |
| This has some text | This has some text |
There is no space between the cells, but there is 10 pixels of space between the border and the content inside. The next table has cell spacing of 10 pixels, cell padding of 10 pixels, and a border of 5:
| This has some text | This has some text |
| This has some text | This has some text |
Hopefully, you get the idea of how the table properties effect the way tables look and are spaced.
Note, when you're trying to select the whole table at once, you can use the Elements Bar, discussed in the User Interface section.
Row & Column Spanning
What if you want to create a table with some adjacent cells joined to make one big cell like this:
| One big row | |
| This has some text | This has some text |
Or this:
| One big column | This has some text |
| This has some text |
This is actually very easy to do in Composer. Click the mouse in the first cell you want to join with another cell, and drag the cursor either up and down to highlight parts of a column, or left to right to highlight parts of a row:

Then click on Table | Join Selected Cells. The selected cells are now joined (in this case, into a row spanning 2 columns):

As a final note to this tutorial, remember that you can put tables within tables (called table nesting). To isolate which table or cell you wish to work with, remember to use the Element Bar. It is your best friend for doing advanced table edits in Composer.
| <<Previous Section: Adding Images |
Copyright ©2004-2006
Jerry Smith
Direct any questions or comments to tsmith0@tds.net